
Are you also looking for how to start a blog in 2025?
In this guide, we’ll discuss a step-by-step process to create an effective blog that can help you build an online presence, drive traffic, and establish authority over time.
Hey I’m Kishan Singh – I have years of experience in blogging and helped numerous aspiring bloggers to learn full-time blogging. In the last few years, the blogging process has significantly evolved due to major changes in Google’s algorithm.
In 2025, the core of blogging is not about using fancy SEO terms but about creating genuinely valuable content. Google’s search engine primarily checks the site’s intention in its content. This is just one tip, and many others are waiting for you.
You will learn how to start a blog from scratch, drive thousands of traffic, and make money. Let’s dive straight into the blog!
10 Effective Steps to Start a Successful Blog in 2025
Below, we’ve mentioned ten effective steps to build a successful blog in 2025.
Step 1: Set a Goal for Your Blog
Before you directly jump into the hassles of creating and checking out strategies to create a blog, it is foundational to define why you’re starting a blog. Defining the goal for blogging can help you better shape your content, voice, audience, and even monetization strategy.
Ask yourself a few questions:
- Are you blogging to build a personal brand?
- Are you blogging to set up a passive income?
- Are you blogging to create a portfolio?
- Are you starting a blog to increase website traffic?
By setting up a clear goal, you create a ‘north star’ for your blogging journey that guides you on every decision – from selecting your niche to your posting schedule.
Now, I assume you are pretty sure why you’re starting a blog. So, let’s head to choosing your blog name and niche.
Step 2: Choose a Blog Name and Niche
One of the foremost things that you need to do to start a blog is select a domain name and niche. A domain name is the web address for your blog, such as “Kishan Singh.in,” and a niche is a specialized topic or focus area that a blogger chooses to write about, targeting a specific audience with relevant content.
If you have already decided on a blog name, use the link below to check that it is available and that no one else has registered with it.
If your blog name is unique, congrats! Go ahead directly to step 2 with your niche.
In case your desired blog name is already taken, you may try a few things:
- Use different domain extensions: If .com is unavailable, you may also go for your blog name’s .net, .in, .org, or .co version.
- Add dashes: You may use a dash between your blog name, like “Kishan-singh.com.” (You must know that you can not use any punctuation other than dash in a domain name).
- Add small words: You may add some small words before your blog name, like “a,” “the,” or “best.” For instance, it may look like “thekishansingh.com“
- Use domain name generator tool: You may tell your selected domain name to the domain name generator AI tool to get some great alternatives.
How to Choose a Domain Name and Niche for Your Blog?
If you have absolutely no clue about your blog name, let me help you!
First, go through the list of potential niches mentioned below and select the one where you excel and properly align with your goals.
🔥 Niche Keyword Ideas for Blogging in 2025
| Niche | Keyword | Monthly Searches | Difficulty |
|---|---|---|---|
| Personal Finance & Investing | budgeting tips for beginners | 6600 | Medium |
| Personal Finance & Investing | best investment apps 2025 | 2900 | Medium |
| Personal Finance & Investing | how to save money fast | 8100 | Low |
| Technology and AI | latest AI tools 2025 | 2400 | Medium |
| Technology and AI | best tech gadgets for students | 1900 | Low |
| Technology and AI | AI tools for content creation | 1600 | Low |
| Health & Wellness | home workout for weight loss | 9900 | Medium |
| Health & Wellness | mental wellness tips | 5400 | Low |
| Health & Wellness | intermittent fasting guide | 8100 | Medium |
| Travel | budget travel destinations 2025 | 2900 | Low |
| Travel | best places to visit in Europe | 12100 | Medium |
| Travel | travel packing list for women | 4400 | Low |
| Food & Recipes | easy dinner recipes for family | 14800 | Medium |
| Food & Recipes | vegan breakfast ideas | 6600 | Low |
| Food & Recipes | low carb meal plan | 5400 | Medium |
| Personal Development & Self Care | how to build self discipline | 3600 | Medium |
| Personal Development & Self Care | morning routine for success | 2900 | Low |
| Personal Development & Self Care | journaling prompts for mental clarity | 1900 | Low |
| Lifestyle | minimalist lifestyle tips | 4400 | Low |
| Lifestyle | daily habits for a better life | 3600 | Low |
| Lifestyle | weekend routine ideas | 1600 | Low |
| Make Money Online | how to make money from home | 18100 | Medium |
| Make Money Online | freelancing websites for beginners | 6600 | Low |
| Make Money Online | passive income ideas 2025 | 4400 | Medium |
| Fashion & Beauty | latest fashion trends 2025 | 2900 | Medium |
| Fashion & Beauty | makeup tips for beginners | 12100 | Low |
| Fashion & Beauty | skincare routine for glowing skin | 9900 | Medium |
| Pet Health | dog food recommendations | 9900 | Low |
| Pet Health | home remedies for cat cold | 1900 | Low |
| Pet Health | how to keep pets healthy | 2900 | Low |
| Entertainment | top Netflix shows 2025 | 14800 | Medium |
| Entertainment | celebrity news today | 18100 | Medium |
| Entertainment | best comedy movies on Amazon Prime | 4400 | Low |
| Digital Marketing | email marketing strategy 2025 | 3600 | Medium |
| Digital Marketing | best SEO tools for beginners | 5400 | Low |
| Digital Marketing | social media marketing tips | 8100 | Medium |
| Relationship | how to improve communication in a relationship | 5400 | Medium |
| Relationship | long distance relationship tips | 3600 | Low |
| Relationship | healthy relationship boundaries | 2900 | Low |
| Debt Management | how to pay off credit card debt fast | 8100 | Medium |
| Debt Management | debt snowball vs avalanche | 1900 | Low |
| Debt Management | consolidate student loans | 2900 | Medium |
| Skincare | best moisturizer for oily skin | 12100 | Low |
| Skincare | morning skincare routine | 6600 | Medium |
| Skincare | how to treat acne naturally | 8100 | Medium |
| Cryptocurrency | best crypto to invest in 2025 | 5400 | Medium |
| Cryptocurrency | how to buy bitcoin safely | 8100 | Medium |
| Cryptocurrency | crypto wallet apps | 2900 | Low |
| Artificial Intelligence | how AI is changing the world | 5400 | Medium |
| Artificial Intelligence | AI use cases in 2025 | 3600 | Low |
| Artificial Intelligence | AI in daily life examples | 2400 | Low |
| Books Summary | atomic habits book summary | 9900 | Low |
| Books Summary | rich dad poor dad summary | 8100 | Low |
| Books Summary | 7 habits of highly effective people summary | 5400 | Medium |
Once you decide on your niche, click on the link below to generate blog name ideas. Make sure to opt for a name that that is easy to remember and spell and reflects your niche while avoiding hyphens, numbers, and long phrases.
Click here to generate blog name ideas: https://namelix.com/
If you are still unable to decide on your blogging niche and name, I would like to remind you we are living in a world of Artificial Intelligence. You should head up to an AI tool and have a really fruitful conversation. Treat him as another human and talk to him about your goals, future plans, expectations from blogging, and whatever comes to your mind.
Considering these factors, AI tools can suggest a really good name and niche for your blog.
Step 3: Purchase Unique Domain Name and Reliable Web Hosting
To buy a domain name and web hosting, you must directly access the website of a reliable provider. Here, we’ll guide you through a purchasing tutorial on the Hostinger platform.
How to Buy a Domain Name?
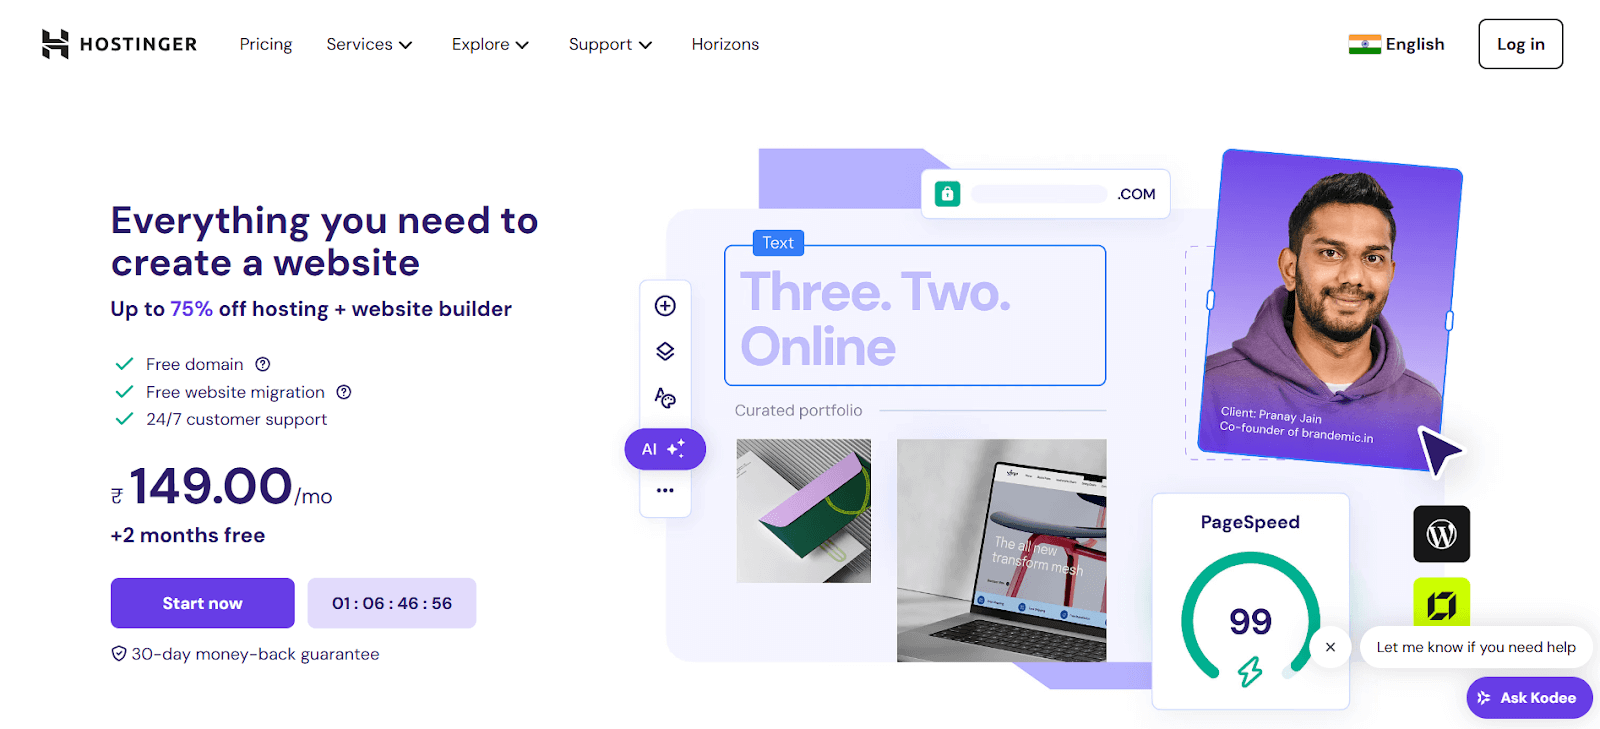
1. Visit the Hostinger website via hostinger.com
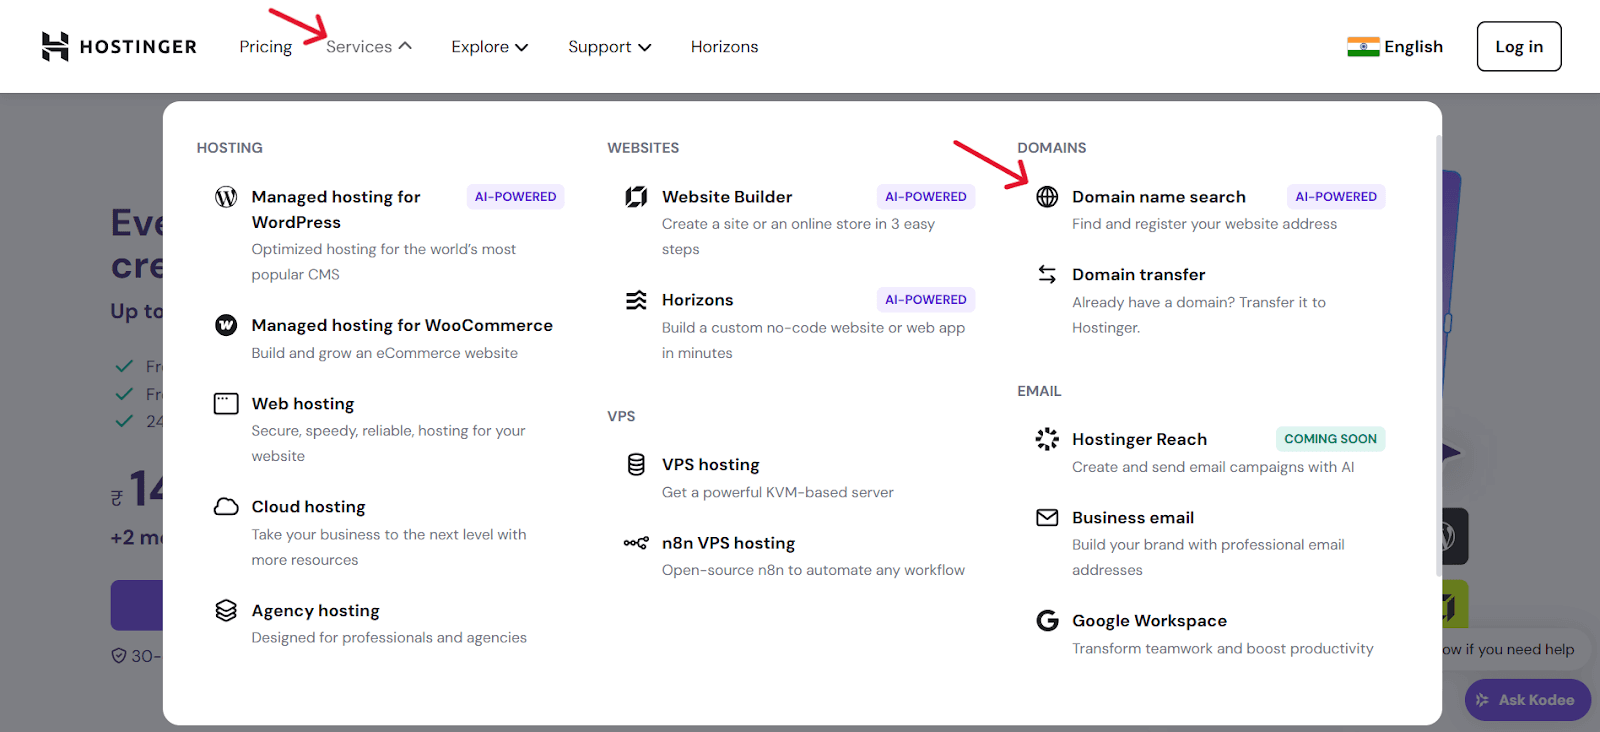
2. Click on the ‘Services’ and ‘Domain name search’ to head to purchase the domain name for your blogging site.
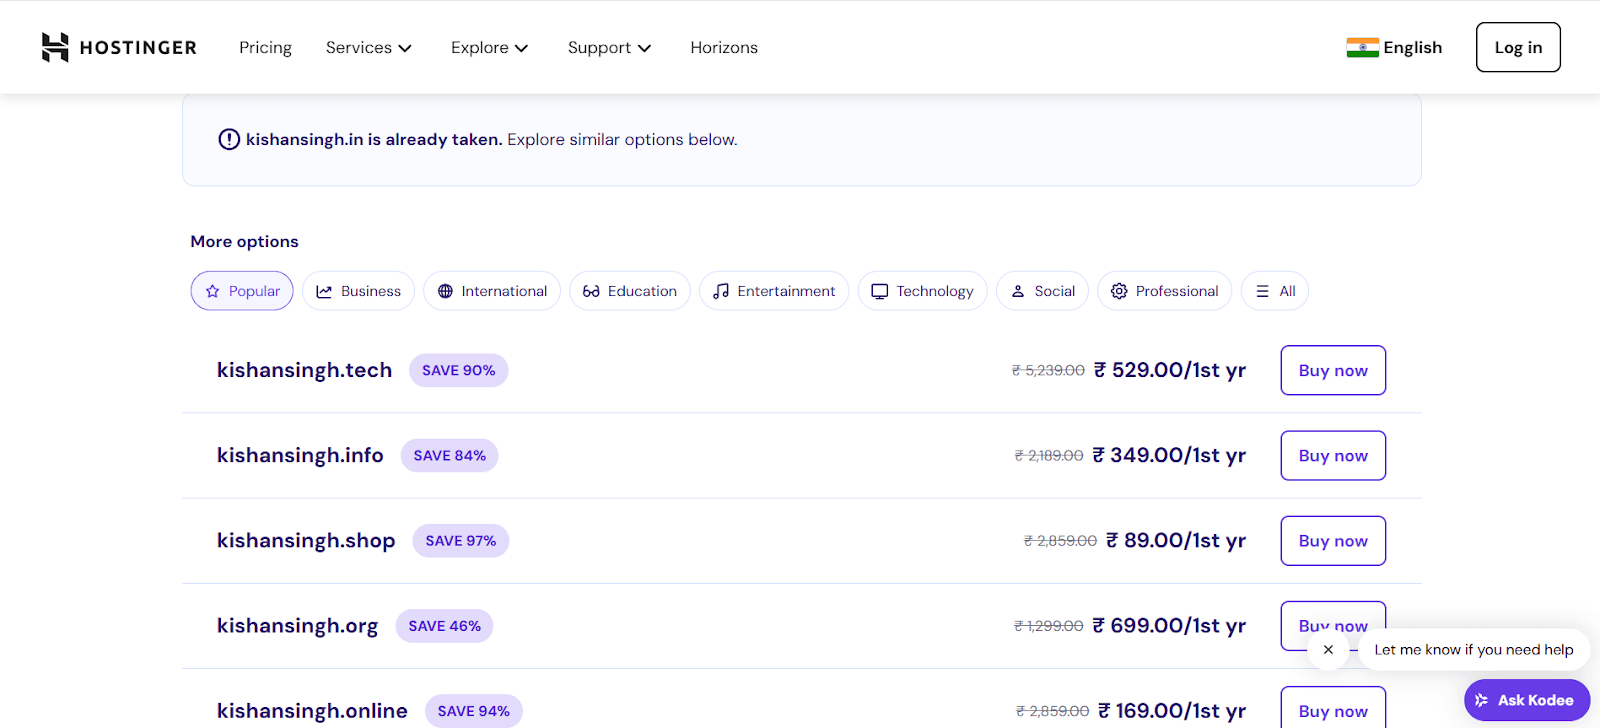
3. Search for your domain name.
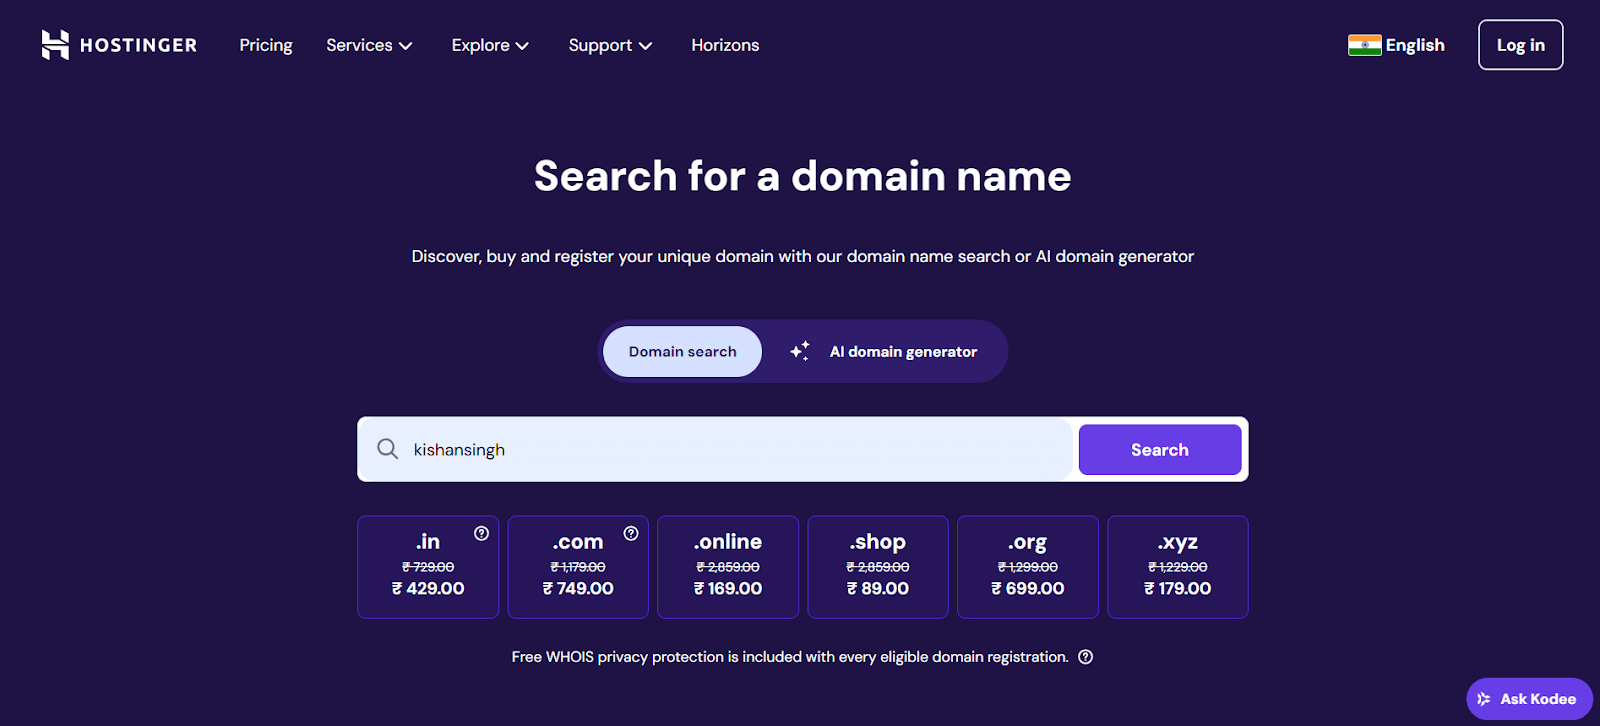
4. You may find your domain name in the way shown below mentioned image. Click on buy now to add your preferred domain name to your cart.
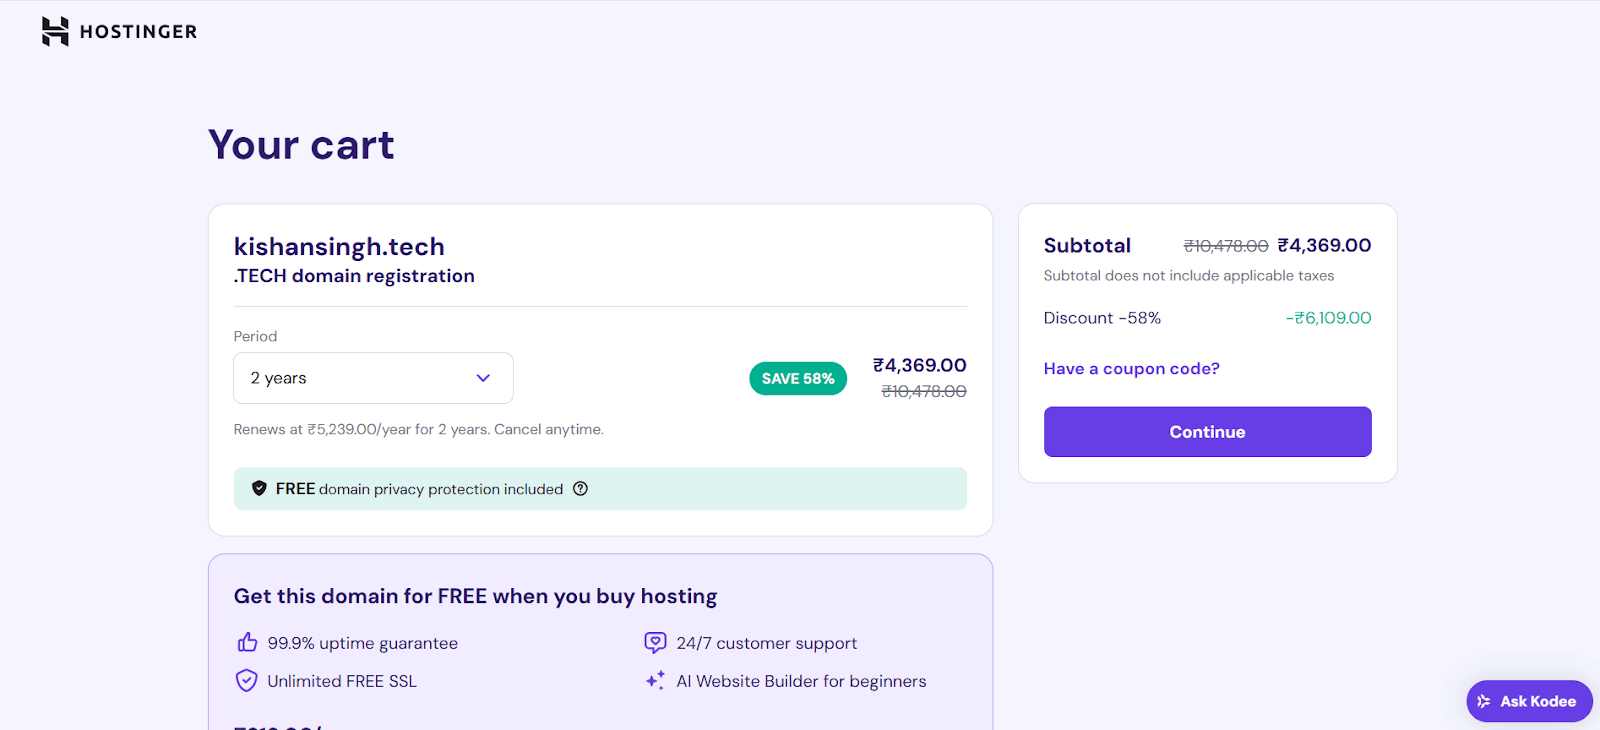
5. Select your preferred domain validity period and tap on the continue button to proceed further. You may also use the coupon code if you have/find anything.
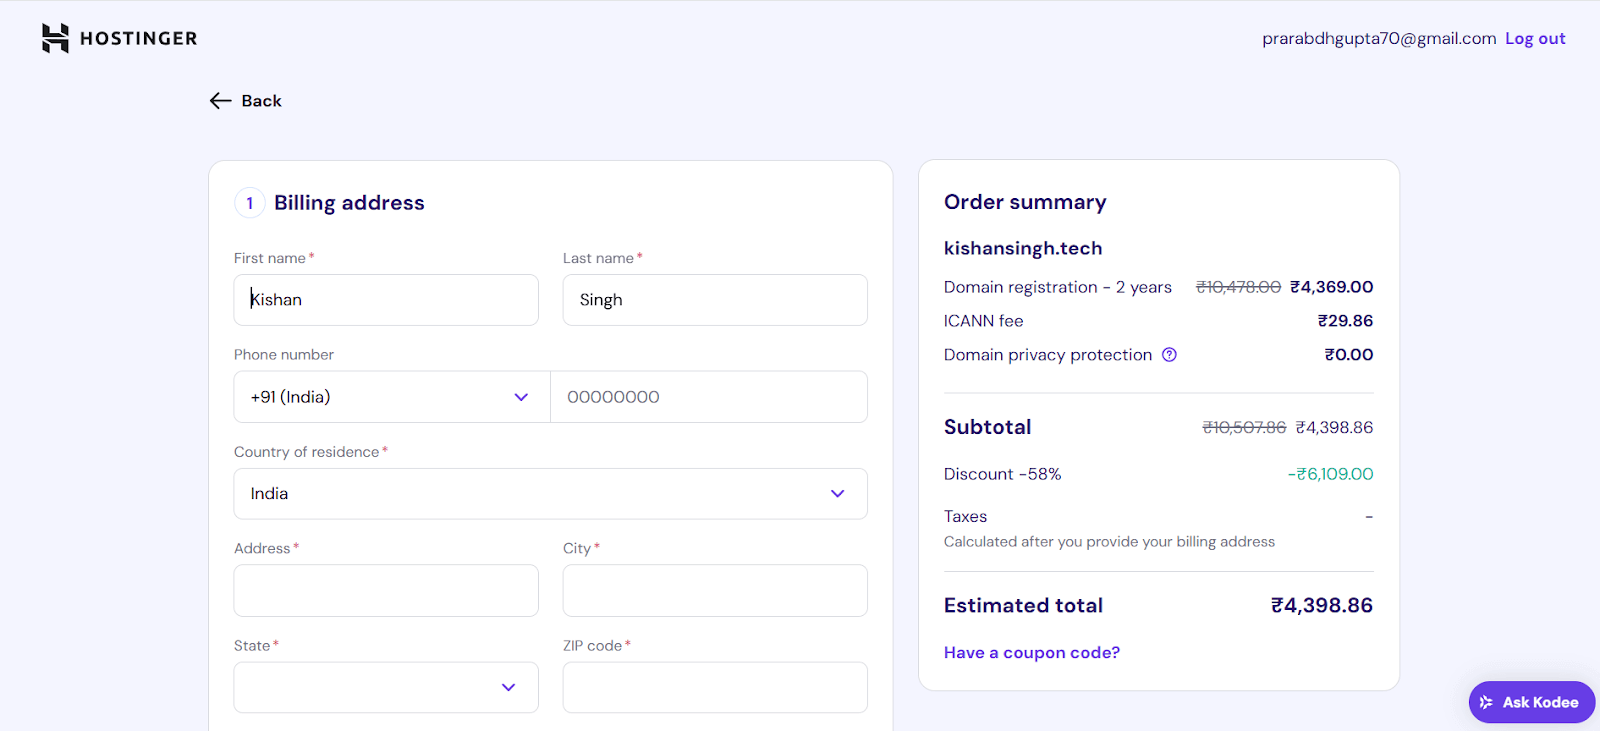
6. Fill your billing details and make the payment to purchase the domain.
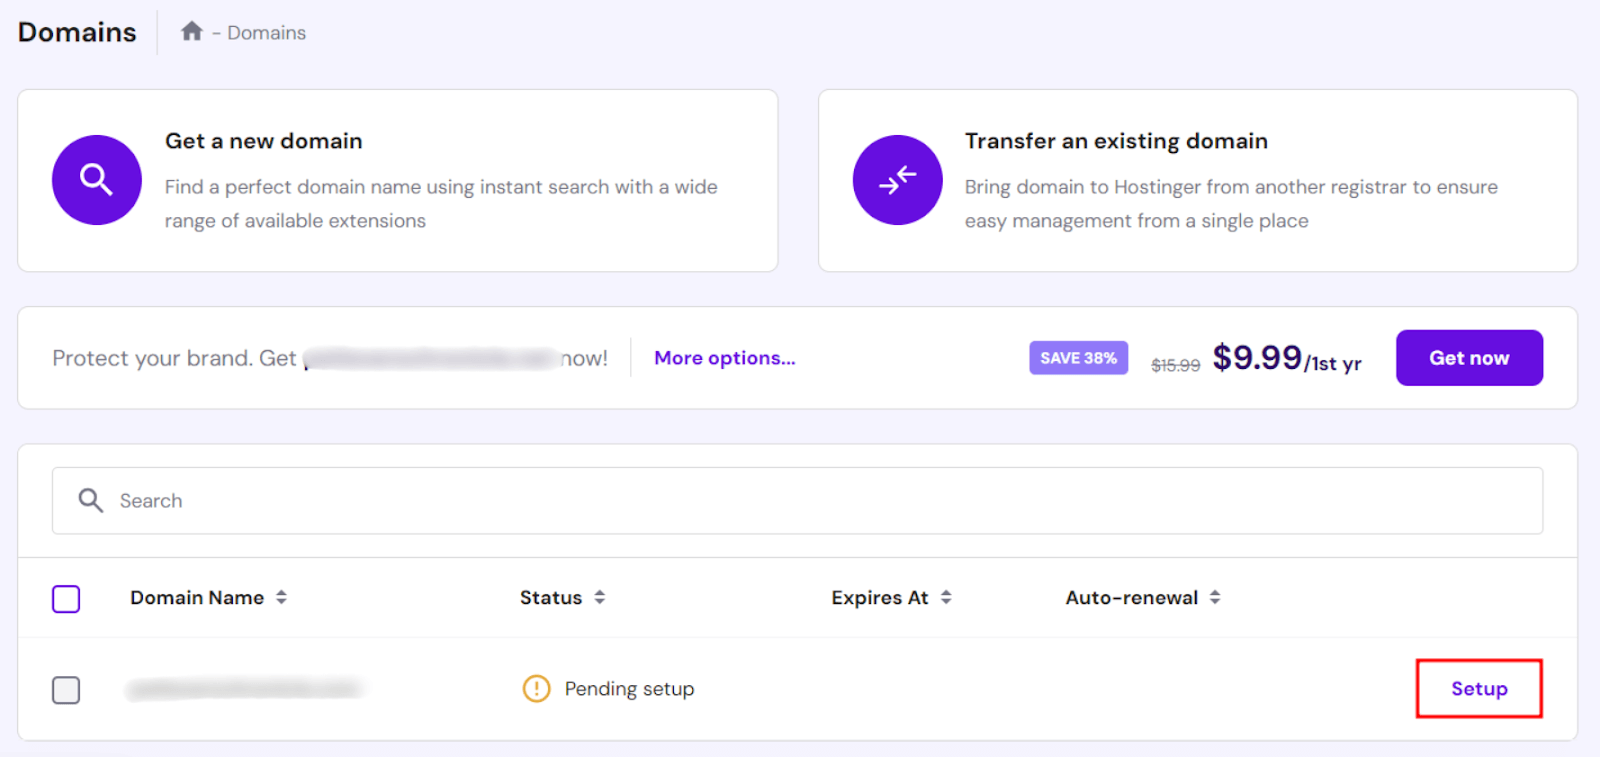
7. Once you make the payment, you will be redirected to the Domains page in hPanel. Click on the ‘Setup’ button next to your purchased domain name.
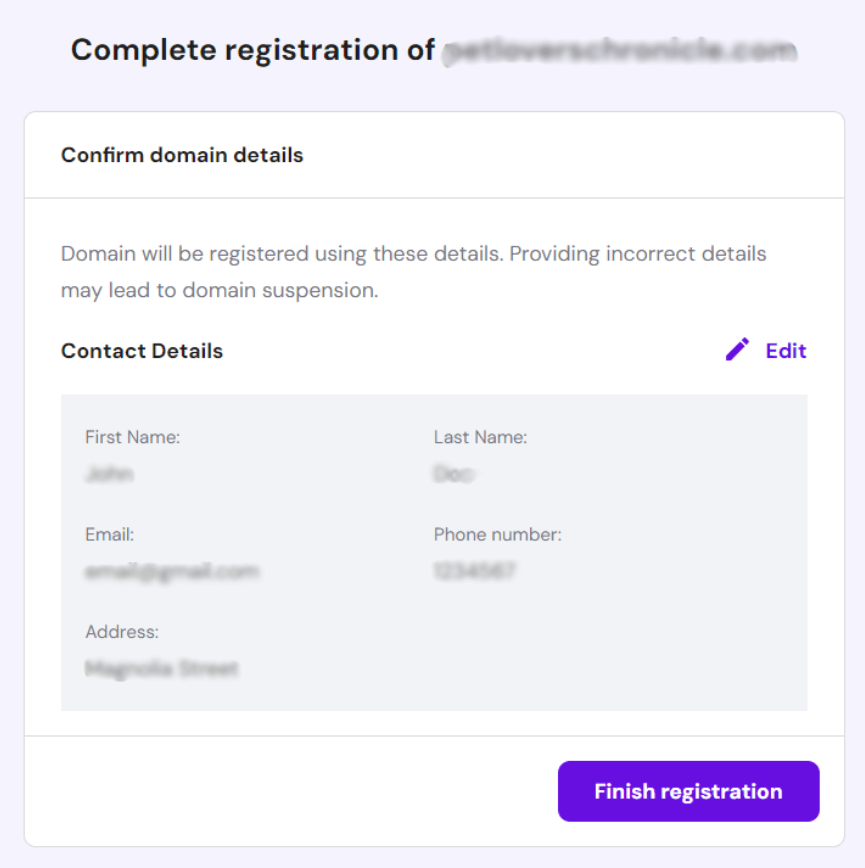
8. Review your domain details and edit the contact details if required. Click on Finish Registration to proceed.
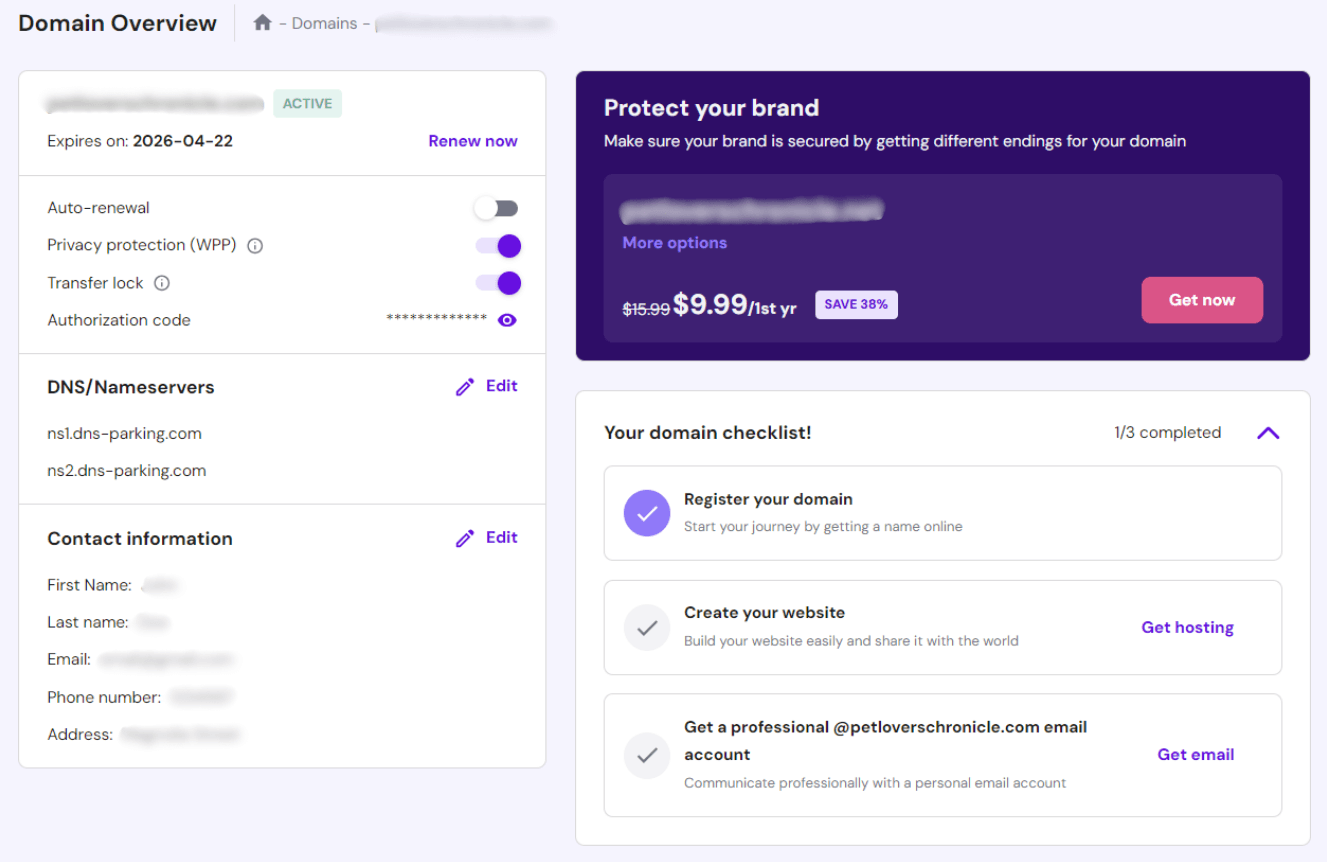
9. Upon successful process, You will be redirected to the Domain Overview page. Use this dashboard to manage and customize your domain settings, including DNS records, domain forwarding, and privacy protection.
How to Buy Web Hosting?
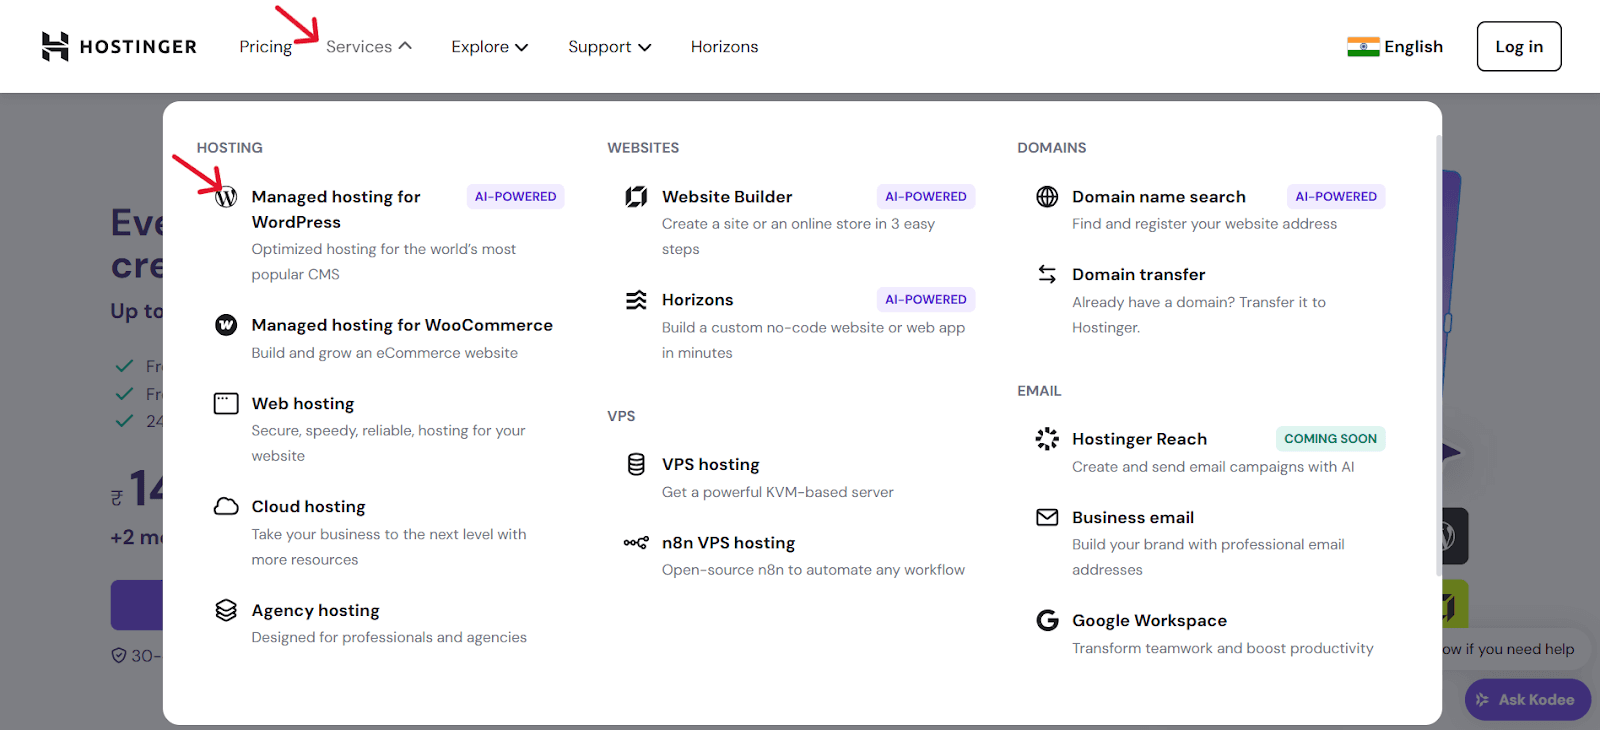
1. Visit the Hostinger sit through hostinger.com

2. Tap on Services and click on the Managed Hosting for WordPress.
3. Select the plan that best fits your site requirements and future plans.
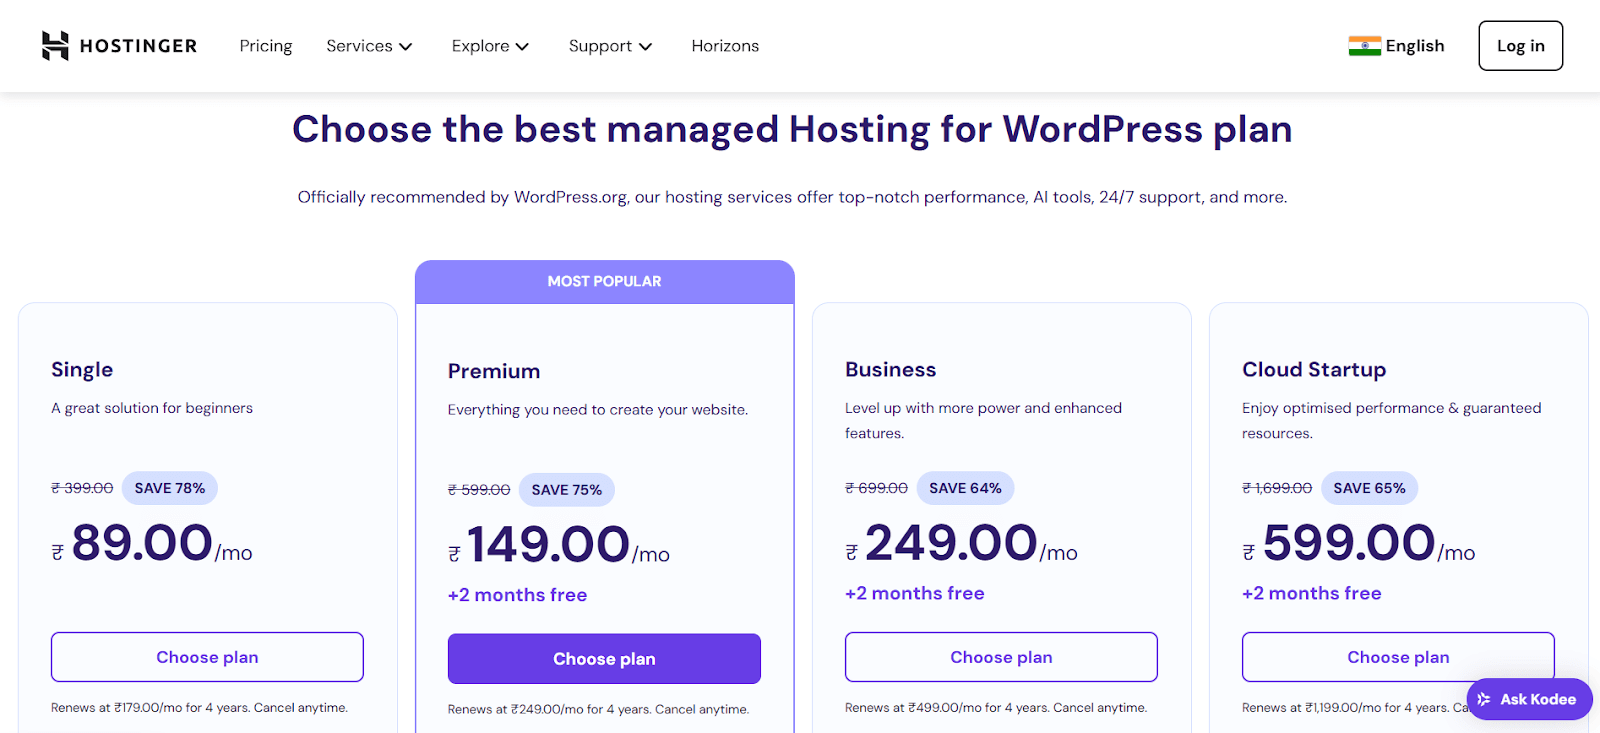
4. Once you choose the plan, you’ll be redirected to Cart to select the hosting period. You may select any period, from 1-month, 12-month, 24-month, or 48-month. Opting for longer periods may save you substantial money in the long run.
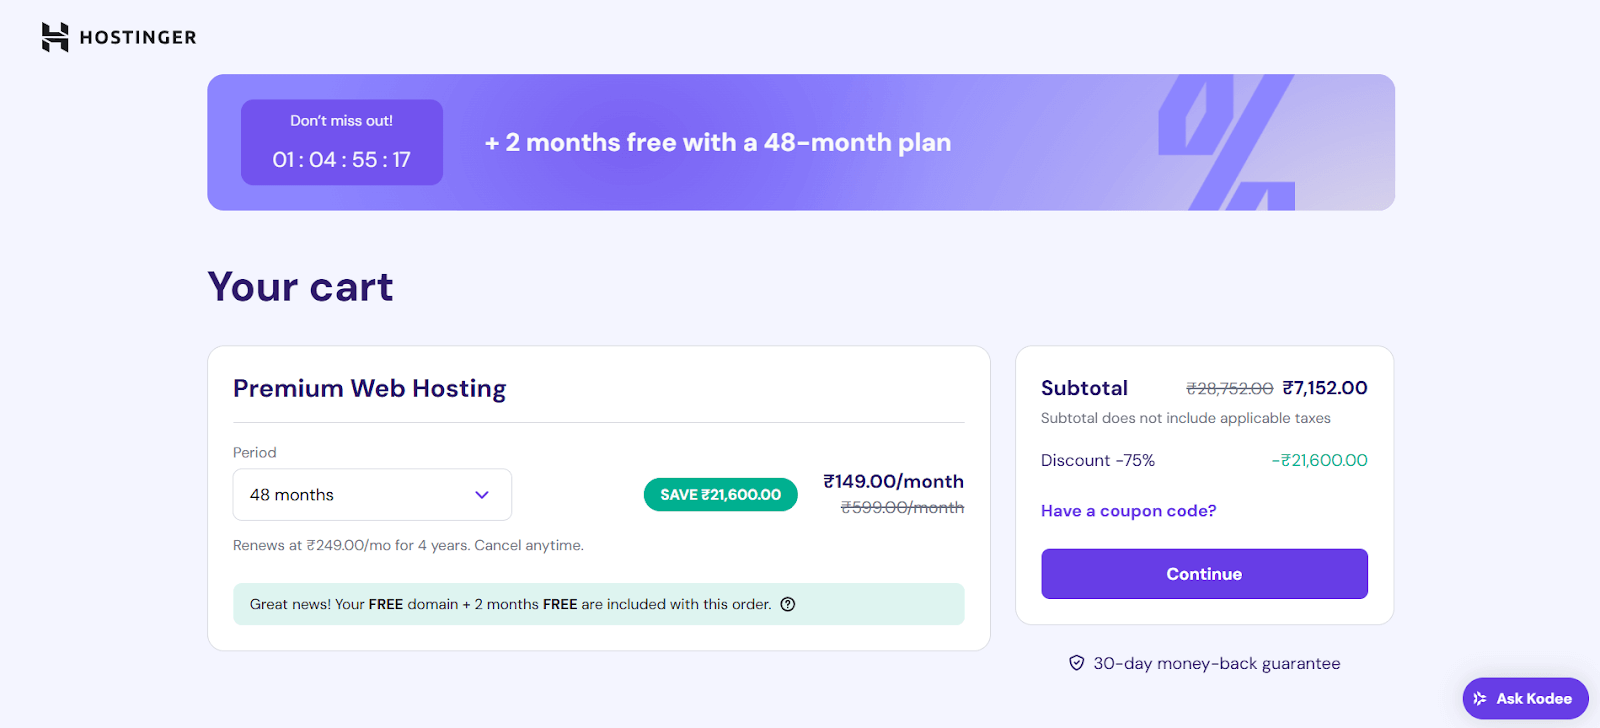
You can change your billing cycle anytime through hPanel. Simply put, if you decide to upgrade your plan, the Hostinger team will add the remaining subscription length to the new plan.
5. Now, enter your billing address and check out the order summary to ensure that everything is correct.

Make the payment based on your preferred payment method, such as debit card, credit card, UPI, PayPal, and eWallets.
Step 4: Configure Your Domain, Hosting, and Blogging Platform
To configure your domain, hosting, and blogging platform, you must open Hostinger’s hPanel.
At this step, we’ll discuss how you can connect your web hosting with your domain name and set up a CMS platform – WordPress.
WordPress is a free blogging platform with almost endless possibilities using plugin functionality. You need to set up your blogging platform to customize the blog’s design and publish content without coding requirements.
Let’s break down the WordPress setup in a few steps.
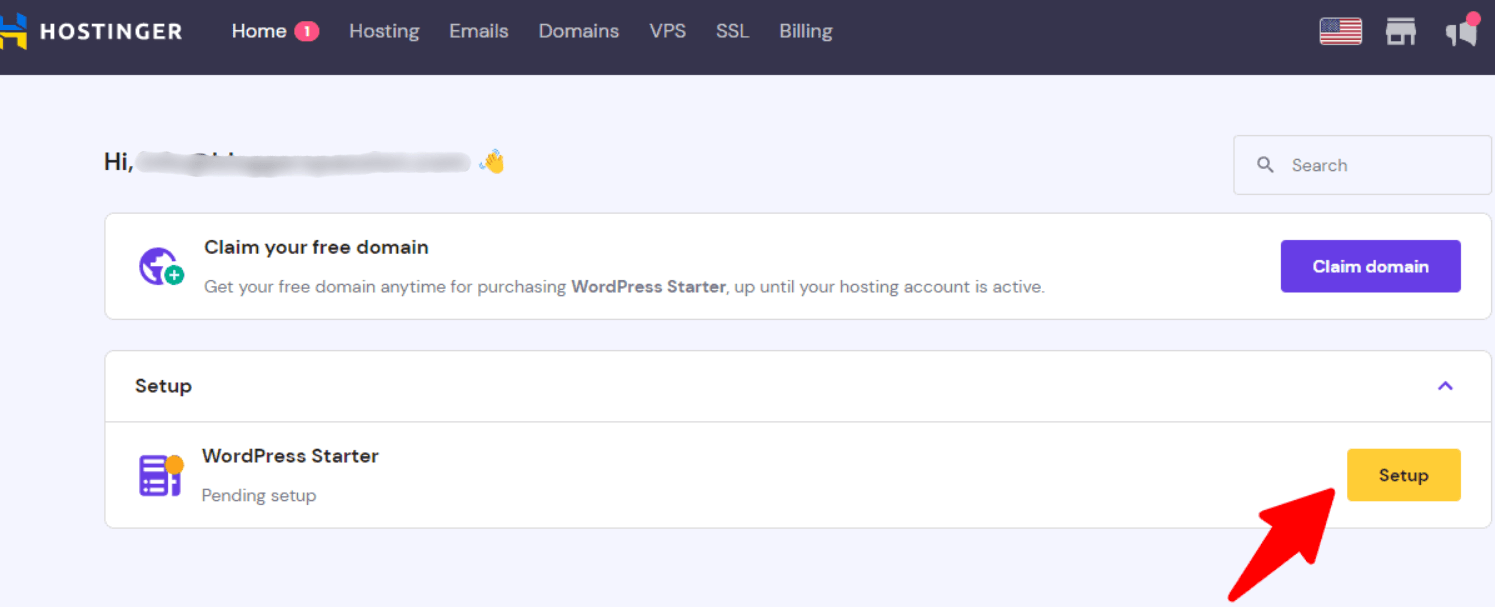
1. Open hPanel and click on the setup button shown on your purchased hosting plan.
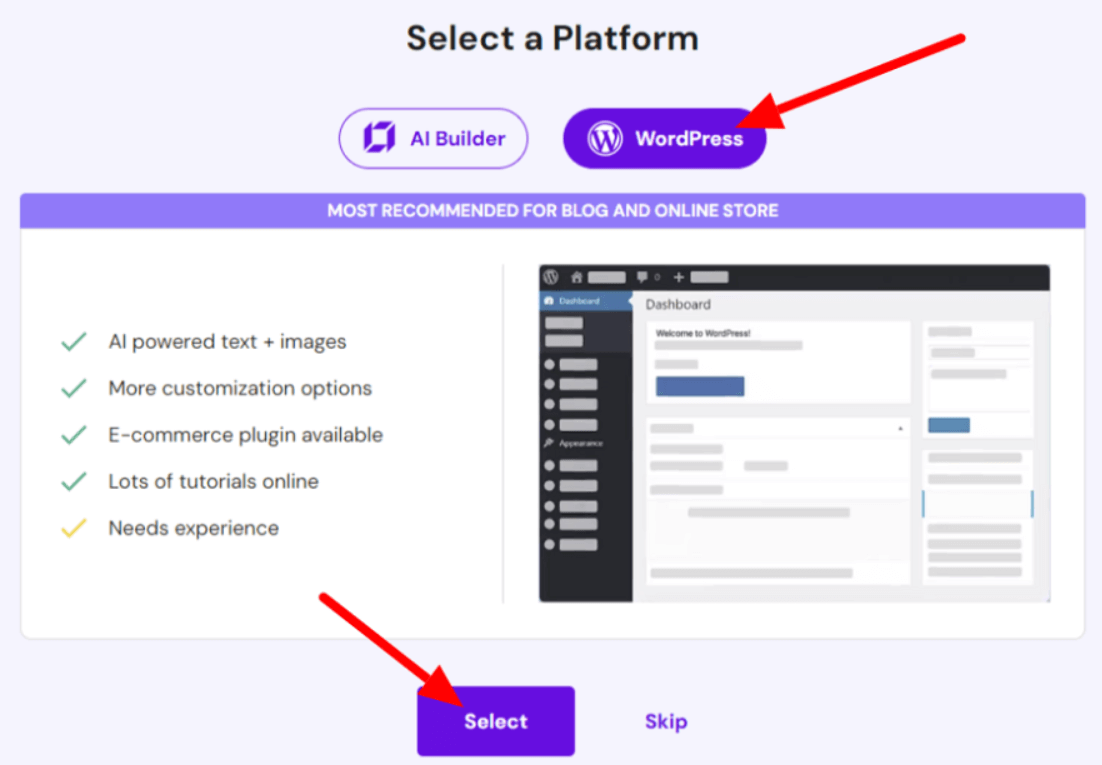
2. Select WordPress and continue by clicking on the Selecting button.
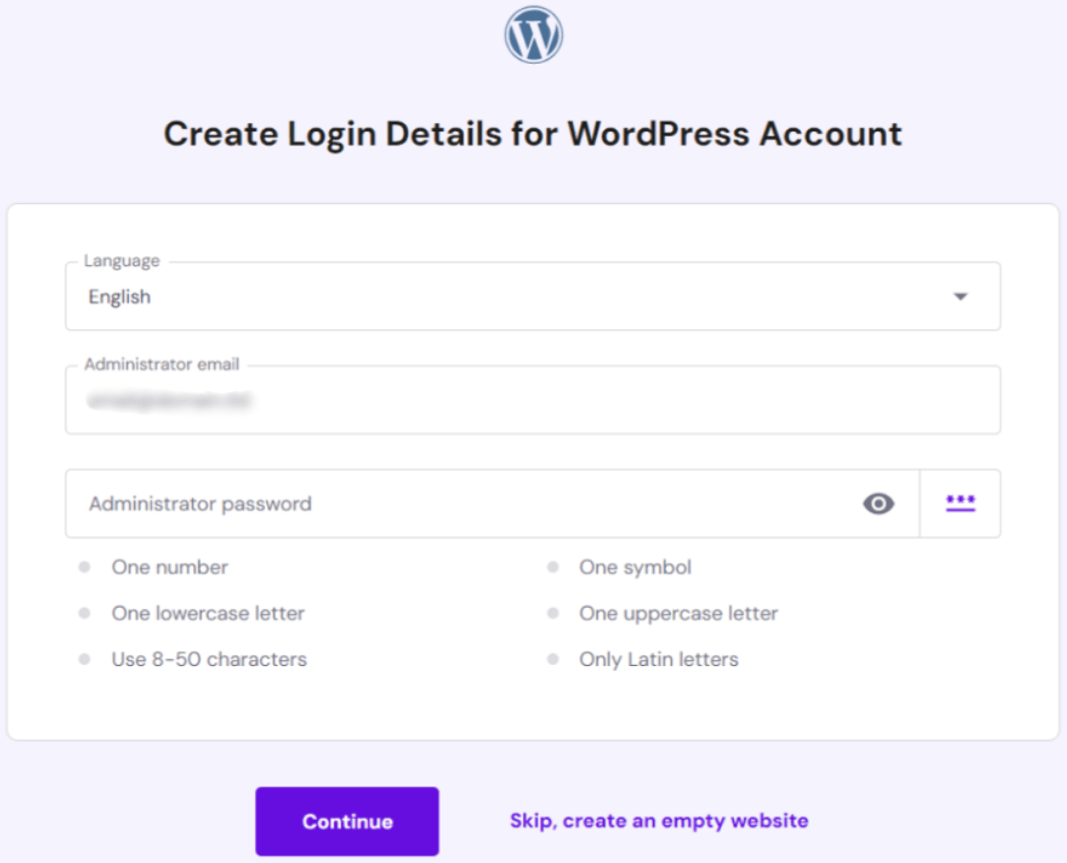
3. Now, you need to set up WordPress credentials.
4. Skip to choose plugins and themes for now.
5. Choose the Domain Name you have just purchased for your blogging site.
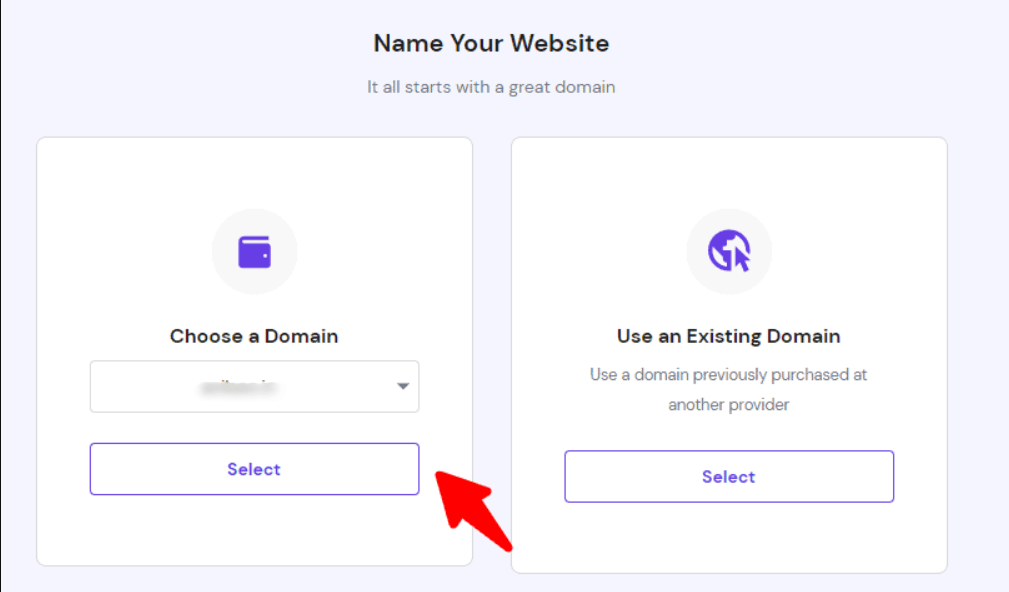
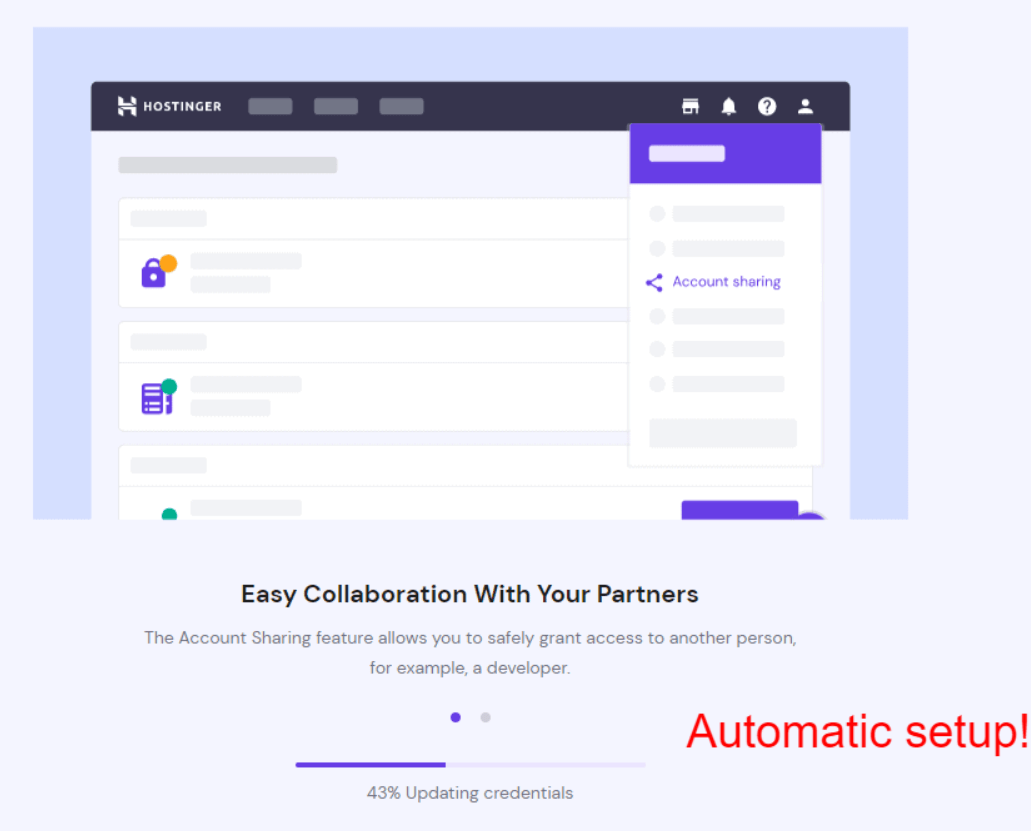
6. Click the Finish button to install the WordPress blogging platform on your blog. It may process some things automatically.
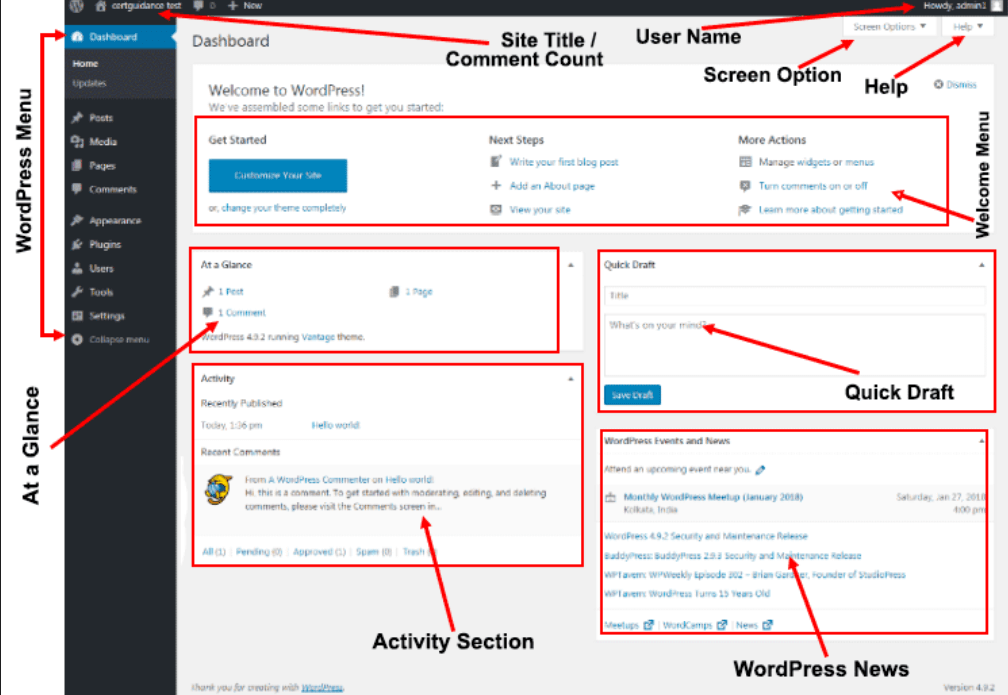
7. Once WordPress installation is done, you can access the admin dashboard via https://yourdomainname.com/wp-admin/
Step 5: Complete Some Basic Blogging Tasks
Below, we’ve mentioned some basic blogging tasks you perform as a blogger.
1. Configure Basic WordPress Settings
Click on Settings > General in WordPress and update the following:
- Site Title: It is your Blog Name.
- Tagline: It is a short description of your blog.
- Time Zone: Set your country’s time zone.
- Set Permalink: In the settings, open Permalinks and opt for “Post Name” for clean URLs.
- Add Site Info: Ensure adding your site title, tagline, and HTTPS is enabled.
- Adjust Reading Settings: Under settings, go to Reading and uncheck “Discourage search engines from indexing this site.”
- Optimize Media Settings: Access Media and configure image sizes to prevent large uploads.
- Ensure Site Visibility: Allow search engines to crawl your site via Settings > Reading.
2. Install WordPress Plugins
Do you know what sets WordPress apart from other CMS platforms is its plugins. From smallest to largest, WordPress offers plugins for almost everything, allowing you to build an amazing website.
Just navigate to WordPress Dashboard > Plugins > Add New.
Here, you’ll find thousands of WordPress plugins designed for various tasks. Let me share some of the most important plugins that I personally use for “kishansingh.in” and which you should also use for your blogging website. Let’s see!
- SEO Plugin: Rank Math is a great on-page SEO plugin that can optimize your website content for search engines.
- Security Plugin: Wordfence Security helps you protect your website from hackers.
- Caching Plugin: WP Rocket Review can improve your site ranking.
- Spam Protection: Akismet Anti-Spam is another important plugin that keeps your comment section clean.
- Contact Form: Contact form by WPForms enables you to set up contact forms on your blog.
- Store Plugin: WooCommerce can help you set up an eCommerce store without any coding.
- Ad Inserter: Ad-Inserter is a plugin used to monetize a site with Google AdSense.
- Affiliate Marketing: Easy Affiliate Links can help you effortlessly manage affiliate links.
- Image Optimization Plugin: ShortPixel Image Optimizer optimizes the image for WordPress and delivers it quickly to users.
- TOC Plugin: TOC Plus allows you to add tables of content in your blog posts.
3. Create Custom Email Address
(i) Access Hostinger’s dashboard and go to Emails > Email Accounts.
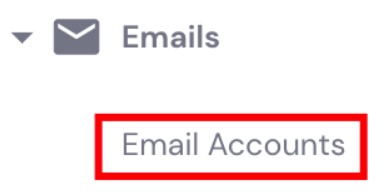
(ii) Select the Domain and click on the respective Manage button.
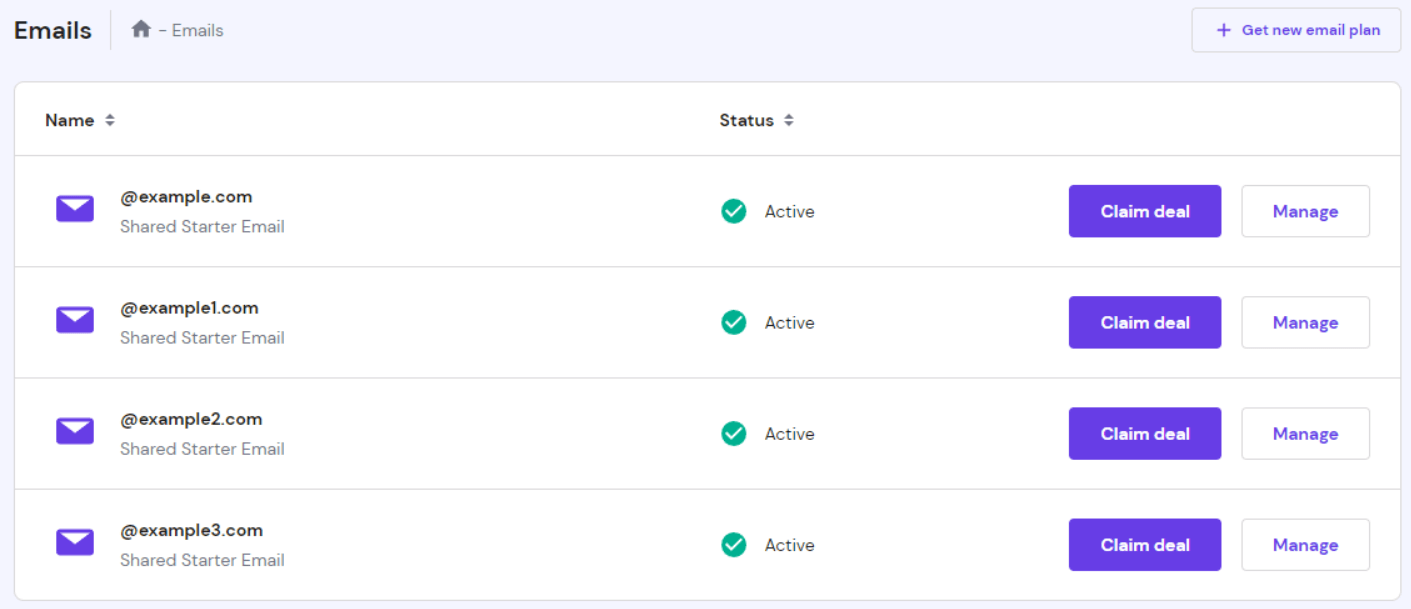
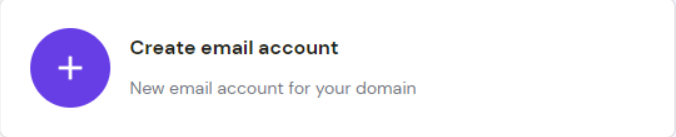
(iii) Tap on “Create email account”
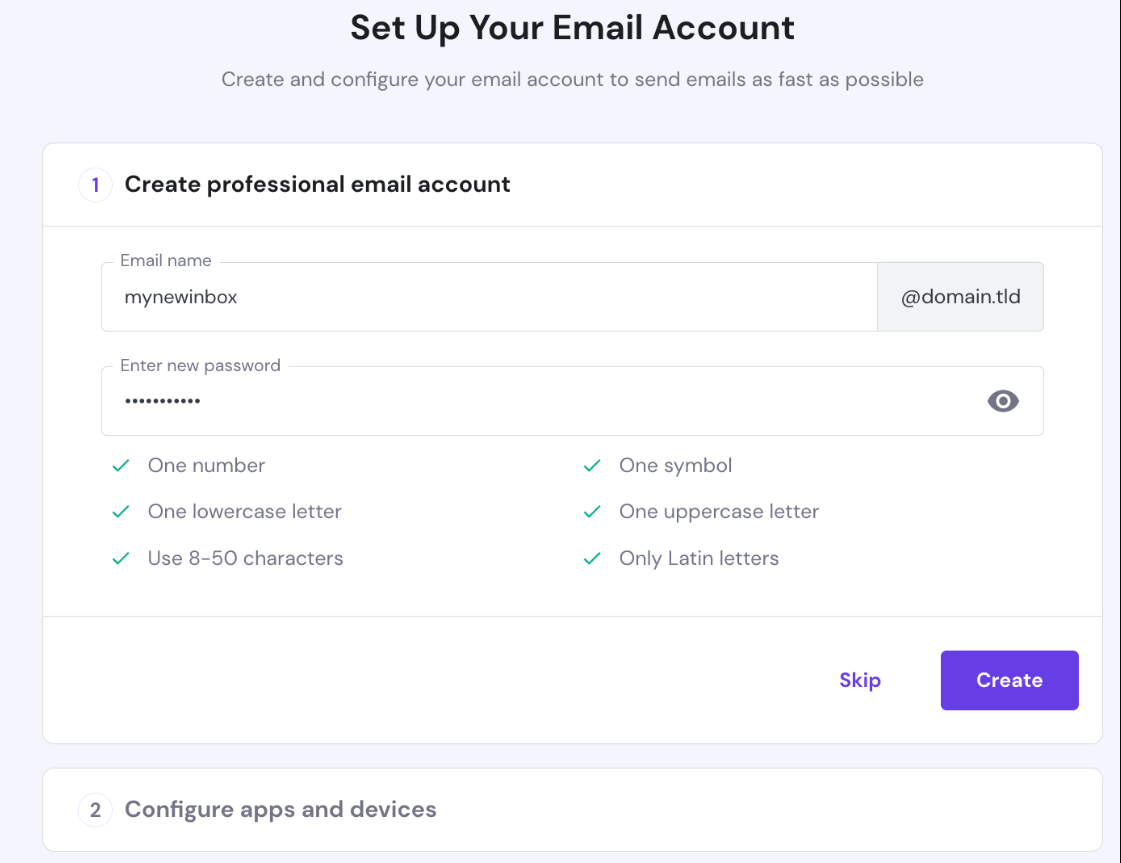
(iv) Enter the email name & password, and click the Create button.
(v) Now, you must select an email application or mobile device to configure the email account. For iOS users, Hostinger offers an Automatic Apple Device device setup option. Follow the instructions and tap on the Complete button.
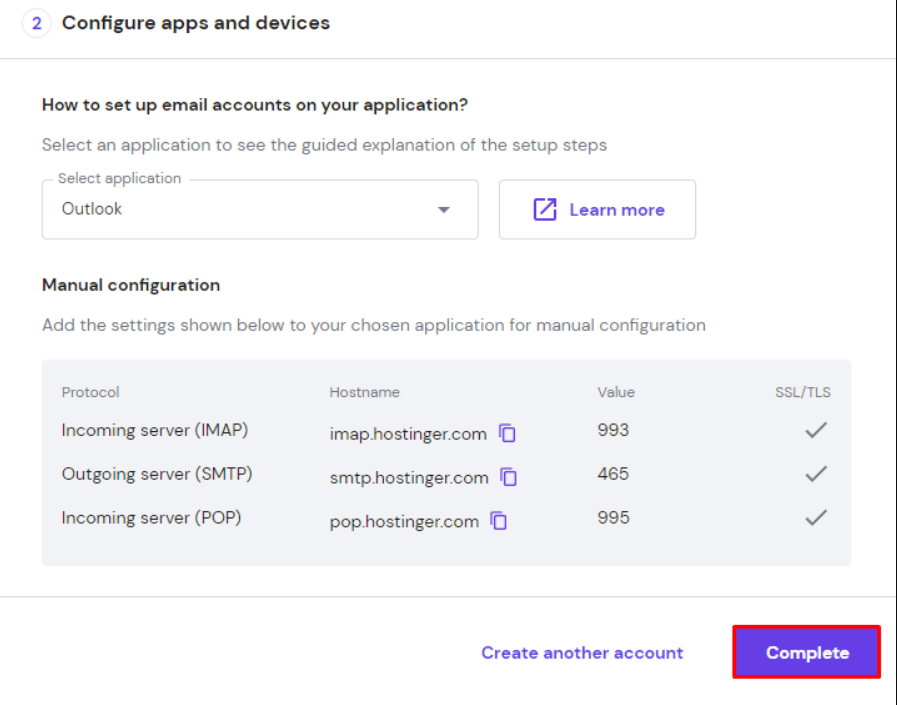
Alternatively, you can manually configure the email account by adding IMAP, POP3, and SMTP protocols.
4. Set Up Google Analytics and Google Search Console
One thing common amongst all serious and successful bloggers is setting up Google Analytics and Google Search Console.
You might be wondering what these are. Let me tell you!
Google Analytics is a free tool that can help bloggers track their site traffic, site top pages, average time spent on blogs, audience demographics, and more.
Google Search Console is another essential tool used to monitor traffic coming from Google’s search engine. Moreover, you can also use it to manage your site and site links that you want to appear, disavow bad backlinks, and more. This tool can even help you submit a sitemap to Google.
The process may seem a little technical, but it is surely worth investing time in. These tools enable you to measure your blogging growth using real-time metrics.
Step 6: Build and Design Your Blog
Now that you have set up the basics of your site on WordPress, it’s time to change the development site. We will guide you through installing themes in WordPress and designing them further. Let’s break down the process into two parts.
Part 1: Installation of WordPress Theme
There are several methods to install WordPress themes, but we will discuss two major methods for now.
Method 1: Using WordPress Theme Directory
Using this method enables you to install free themes from the official WordPress theme directory. Follow a simple three-step process.
(i) Login to WordPress admin account. Click on the Appearance > Themes > Add New Theme
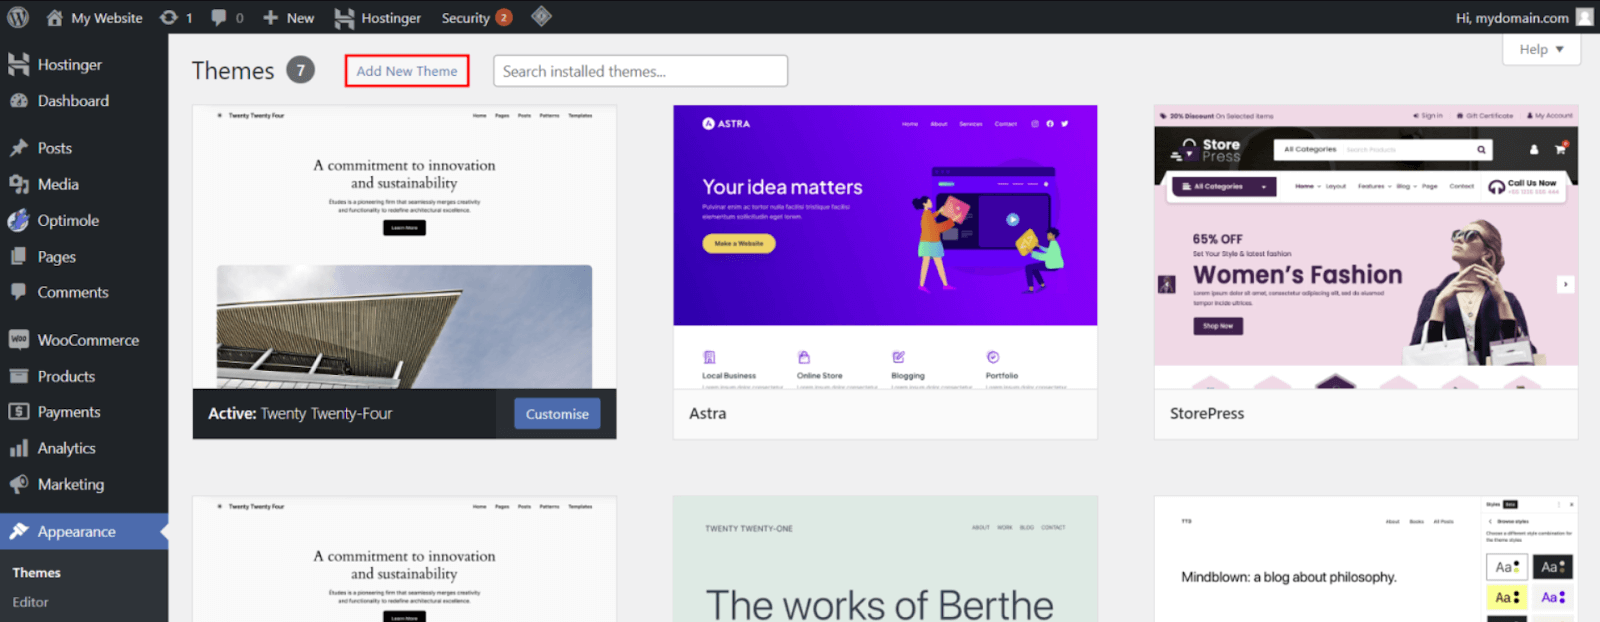
(ii) Use the filter function and search bar to find the best theme for your blog. You can click on Preview to see designs. Once you find a satisfying design, click on the Install button.
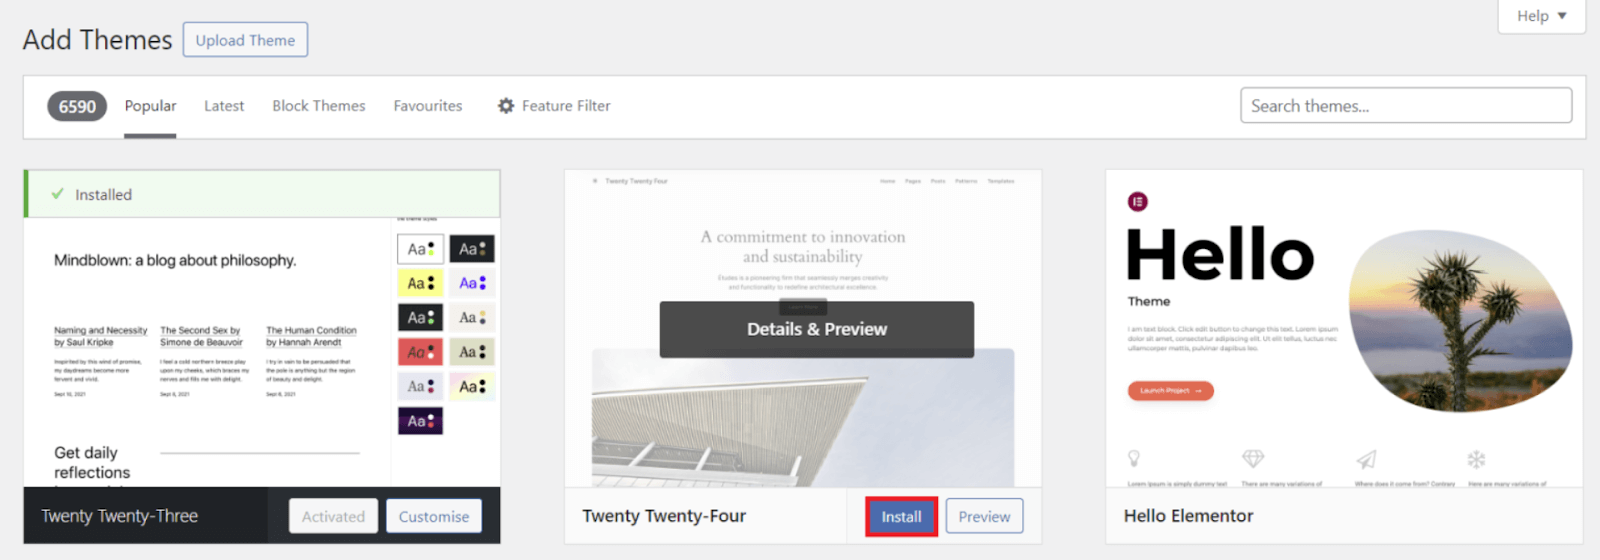
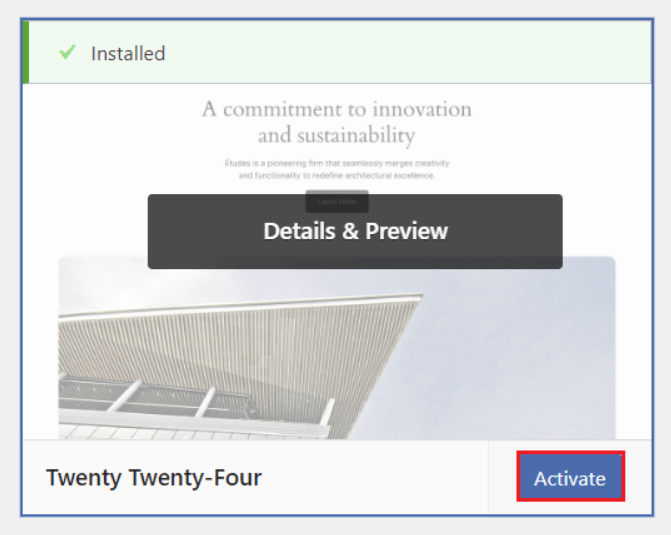
(iii) Once installation is done, click on the Activate button, and your theme will be installed.
Method 2: Uploading a Theme to WordPress
If you want to install WordPress themes from a third-party platform, you must upload them to the website manually. You can use this same method to install premium themes that require you to download assets after purchasing.
Follow the installation process as mentioned below.
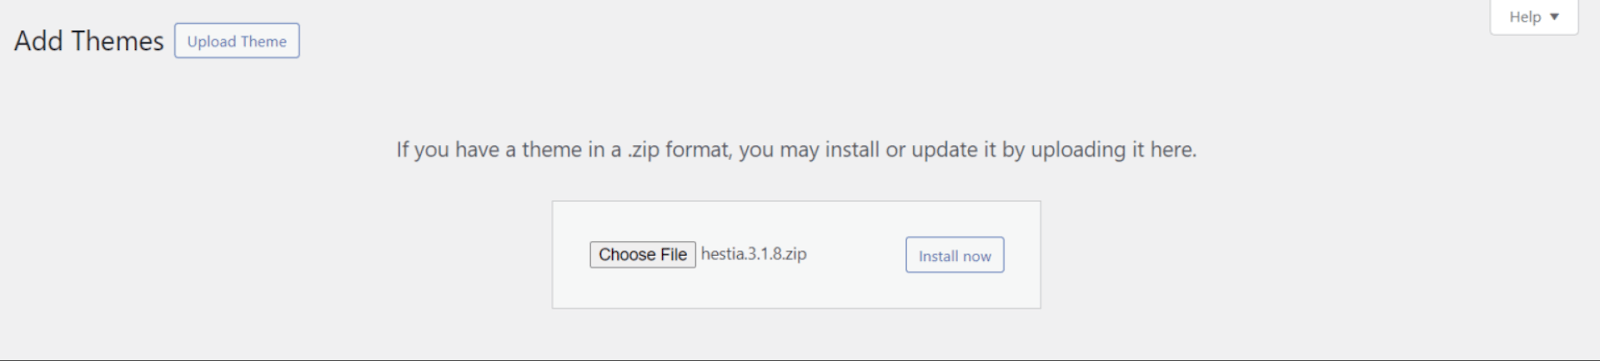
(i) Login to WordPress admin account. Click on Appearance > Themes > Add New Themes. Tap on the Upload Theme button.
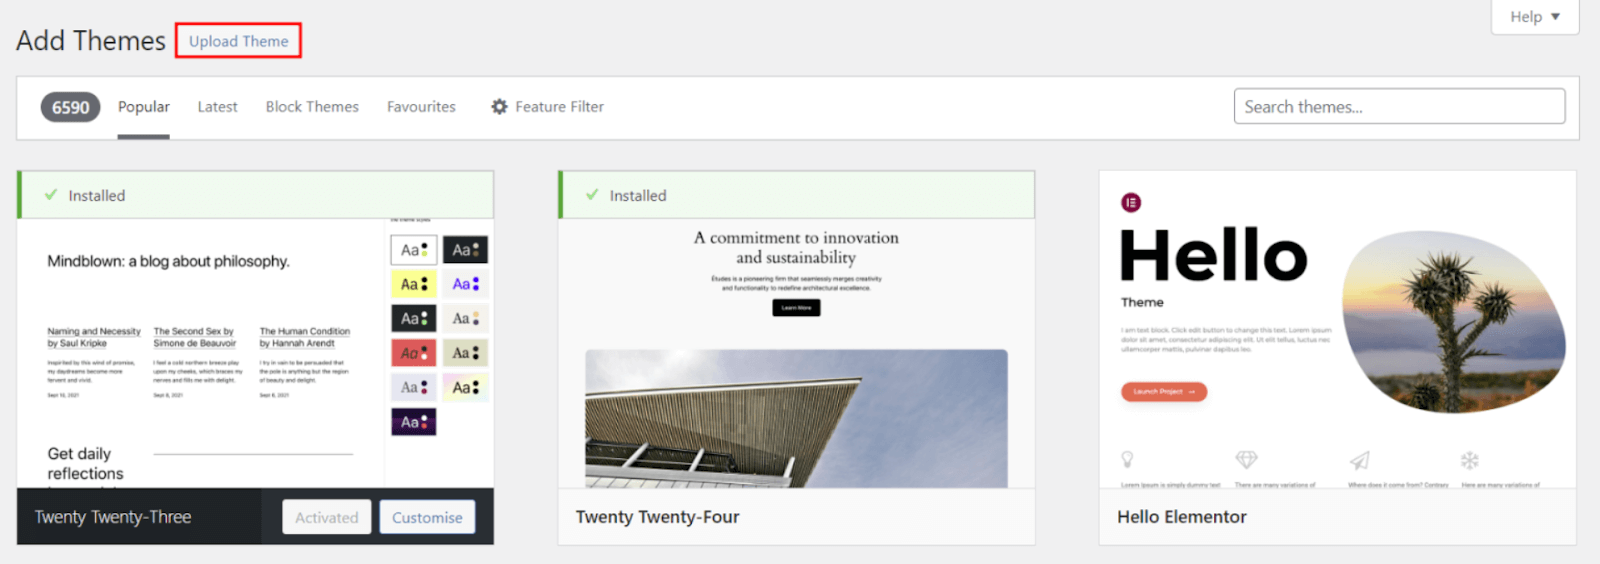
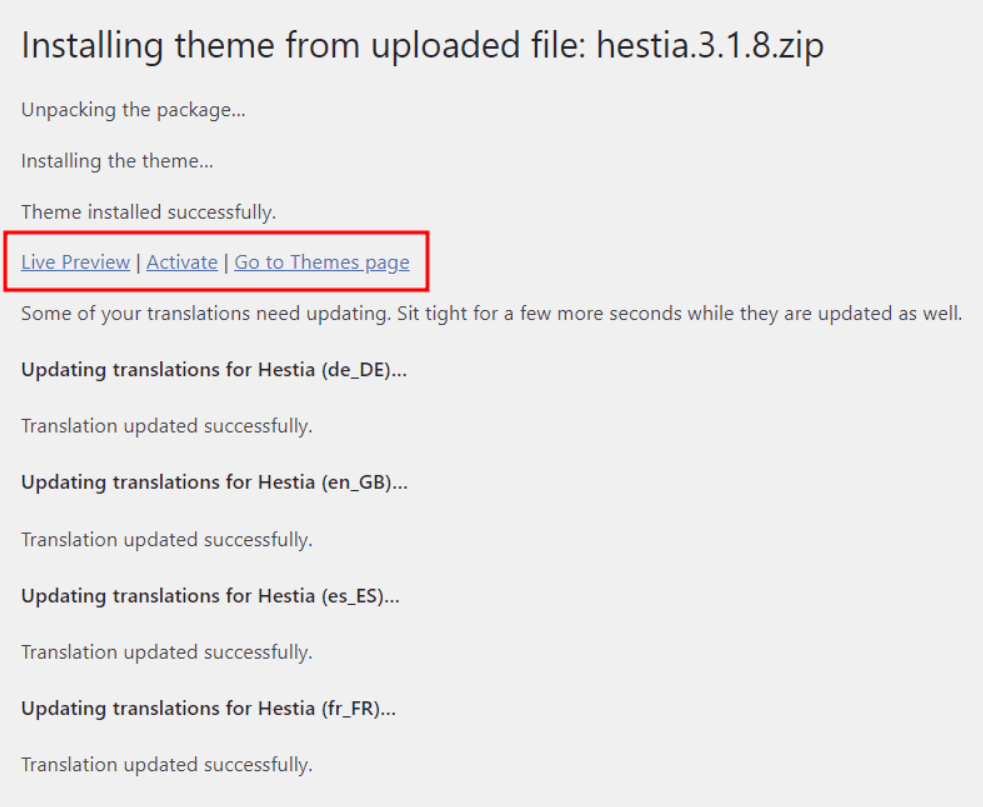
(ii) Now, you must upload the ZIP file of the theme that you have installed from a third-party platform. Click on the Install now.
(iii) Once the theme is installed, you can Preview or Activate it. Click the latter to start using the new theme.
Part 2: Customize Your Blog Theme for a Unique Look
After installing your theme, you must customize its various elements to enhance its appeal.
Navigate to Appearance > Customize
Below, we mention the design elements that you should customize.
- Logo and Site Identity: Upload your tailored logo or site icon for free using Canva.
- Colors and Typography: Pick a specified color scheme that aligns with your blog ideas and niche. Moreover, use Google Fonts for professional typography.
- Header and Menu: You should use a sticky header and keep your menu simple, featuring the Home, About, Blog, and Contact Us pages.
- Homepage Layout: You may use the homepage to display either your latest posts or a static welcome page.
- Footer Widgets: Ensure that you add a brief bio, recent posts, and social media links in your site’s footer.
Tweaking design options may feel strange and confusing for the first time. But, just after a while, you’ll realize that these designs only require minor adjustments. Just customize the above-mentioned design elements based on any inspiration in your mind to make your blog uniquely yours.
Step 7: Create Your Content Strategy and Content Calendar
Now, when your blog is built and designed, it’s time to plan your content strategy – what you’ll publish and how you’ll stay consistent. Blogging with a clear plan can help you never run out of ideas and drive substantial growth.
Here, we’ve defined how you can create a customized content strategy for your blog.
Part 1: Understand Your Audience
Before directly jumping into writing, you must properly understand your audience. Ask such questions:
- Who is my audience?
- What problems are they facing?
- What kind of content do they find more valuable and engage with?
Pro Tip: You may use Google Trends, Reddit, Quora, or even keyword tools like AnswerThePublic and Ubersuggest to research your audience.
If you create your readers’ profiles beforehand, it will be easy to connect them with your content in the long term.
Part 2: Define Your Ideal Content Types
In every niche, you may use a variety of content to keep your readers engaged with your content. Below is the list of certain content types.
- How-to Guides
- Listicles
- Reviews
- Personal Stories
- Case Studies
- Tutorials
You may identify which content works best in your niche by conducting competitive analysis with tools like Semrush or Ahrefs.
If you can not afford Semrush or Ahrefs subscription plan, for now, you may even conduct competitive analysis manually. Follow three simple steps.
(i) See the competitor’s blogs
(ii) Find out the section or category with the most popular content
(iii) Analyze the posts with the highest number of user comments
This simple process may help you define the right content types for your blog.
Part 3: Define Your Content Pillars and
Content Pillars are 3-5 main topics that your blog consistently focuses on. You must decide on these topics based on your blog goals and your audience’s needs.
For instance, if you select a digital marketing niche, pillar content may be:
- SEO Tips
- Social Media Strategies
- Blogging Tools
- Email Marketing
This way, you can strategically always have strong blog ideas that can. Let’s explore how you can brainstorm blog topics in the following part.
Part 4: Brainstorm Blog Topics
Now that you know the required content type for your blog, it’s time to figure out what topics you should create. One of the best ways to research blog ideas is through keyword research.
Use the Google Auto Suggest method by using modifiers like What, Why, and Best before your content to discover more user queries and generate a list of content ideas.
To simplify and enhance the effectiveness of the process, you can also use tools like Semrush to determine the most searched keywords in your niche. This can help you craft blog ideas based on those keywords.
Part 5: Create a Content Calendar
A Content Calendar is one that turns your content strategy into an actionable plan, keeping your ideas organized, your schedule visible, and your publishing consistent.
This may help you plan great content for seasons, holidays, and trends, encourage SEO planning and keyword targeting, eliminate last-minute scrambling, and track your blog progress.
You may use Google Sheets to create and maintain a content calendar in the initial days. Include the following columns in the sheet.
- Post Title/Topic
- Category/Niche
- Target Keyword
- Content Format (Blog, Infographics, etc)
- Publication Platform
- Draft Deadline
- Publishing Date
- Status (e.g., Draft, In-Progress, Published)
- Content URL
Step 8: Learn to Write a Blog Post that Drives Traffic
Once you’re done with the strategic portion, let’s head to learn how you can write blog posts that get massive traffic.
Part 1: Write the Headline
Headline is the first impression that your blog post makes in front of users, and you must ensure that your blog post headlines stand out amongst thousands of headlines on Google and get clicks.
You may include brackets and parentheses within your blog headlines. Also, try to write long headlines to get more user attention.
Here are some of the words and phrases that you can use to start your headline.
- X Reasons Why…
- X Things You…
- This is What…
- X Ways to…
- How to Make…
- Here are the……
- The X Best…..
- Why You Should…..
Feel free to use any of these headline samples to create appealing headlines.
Part 2: Write An Attention-Grabbing Introduction
Use the PPT formula to grab a killer introduction that can grab the reader’s attention and engage it to reading the entire blog post.
The PPT formula stands for Preview, Proof, and Transition.
(i) Preview: Here, you should explain to your reader what to expect from this blog. It will help them know that they have landed at the right place. For instance, you may use a line like “In this blog post, we’ll discuss.”
(ii) Proof: You show your readers that you know what they are talking about by showcasing personal results, years of experience, number of clients, and credentials or certifications. This allows readers to understand why they should listen to your voice.
(iii) Transition: It denotes pushing your readers to keep reading by using simple phrases like “Let’s begin the guide.”
Part 3: Write Amazing Post
Here, we’ve mentioned some of the proven ways to craft an amazing blog article.
(i) Use Section Sub-Headers to break down your content into easy-to-read pieces that make more sense in long-form blog content.
(ii) You should even post a lot of visuals within your blog that may include screenshots, pictures, charts, and infographics.
(iii) Use font text between 16 to 20 pixels. You may see super easy-to-read content on Medium.com because of its clean layout and 21PX font.
(iv) It is better to write long content for blog posts. However, ensure that each and every word adds value to the content and is not a fluff.
Part 4: Write Conclusion
Conclusions are one of the most important sections in a blog, especially to receive comments on your blog. Let me tell you a simple yet effective three step process, named TAC, to write an amazing conclusion.
TAC stands for Transition, Ask, and CTA.
(i)Transition: First, you showcase that your meeting with the blog post is over now, and it’s time to sum things up.
(ii) Ask: Now, ask your reader a very specific question. For instance, if you have written a blog post about different SEO strategies, you may ask, “Which strategy from today’s post are you going to try first?”
(iii) CTA: End your content with a strong Call To Action, such as leaving a comment, sharing on social media, subscribing to your Blog or YouTube channel, etc.
Part 5: Optimize Your Blog for SEO
SEO is a comprehensive concept with various types, including On-Page SEO, Technical SEO, Off-Page SEO, Link Building, etc., that you will learn throughout your blogging journey.
Here, we’ve created a checklist that can help you ensure that your blog content is SEO-friendly.
(i) You must create an attention-grabbing SEO Title.
(ii) You should keep your blog post’s URL short, and it must include the primary keyword.
(iii) Make sure to include a keyword in your SEO meta description.
(iv) Use the H1 Tag for the main headline of the blog.
(v) Do include target keywords and related terms within your H2 and H3 tags.
(vi) You should connect multiple blogs by interlinking them.
(vii) You should add primary keywords within the first and last 100 words of the blog content.
(viii) You should include main keywords in the images as well as their alt tags to make them SEO-friendly.
Step 9: Promote Your Blog Posts
Till now, you have only learned to write blog posts. If you want to attract traffic, you need to promote them, especially during the initial days of your blog.
Below, we’ve mentioned some of the popular ways to promote your blogs.
(i) Aware Your Inner Circle: First, you should promote your blog within your inner circle, including family, friends, and colleagues. Ask them to follow your blog and mention your new blogs on their social handles.
(ii) Use Social Media: There are many social media platforms that can help you drive traffic to your blog, including Facebook, Twitter, YouTube, Pinterest, LinkedIn, Reddit, Instagram, Snapchat, and TikTok.
Each platform has a different set of audiences. You should select the social platform to promote your blog based on your audience. If you create really good social media posts, there are higher chances of going viral and driving traffic to your blog.
(iii) Comment on Other Blogs: Identify other blogs within your community and engage with them in their comment section. You may leave engaging and constructive comments while introducing yourself.
This way, you can create good relationships with prominent bloggers in your community. Plus, they may even allow you to leave a link to your blog, enabling you to set yourself within their ranks quickly.
(iv) Collaborate with Other Bloggers: Collaboration is key to growing on any platform. You should also collaborate with other bloggers in your community via guest posting, promoting each other’s blogs and products, and regularly interacting through comments and social media.
(v) Use Email Newsletter: Newsletters perform way better than social media in promoting blogs. Thus, focus on building your email newsletter or own email list to keep your audience engaged over time.
Step 10: Update Your Content Regularly
As time rolled out, it was important to update old and existing content. You do it by:
- adding new information
- linking to related posts
- removing outdated information
- updating your writing style
- fixing broken links
Also known as a content refresh strategy, it can promote the holistic growth of your blog. It signals to Google that you take care of your entire content, which helps your blog grow even more.
Here’s the Most Effective Strategy to Make Money through Blogging
Blogging is a long-term game which requires you to be a little patient when it comes to monetization. However, you can build multiple income streams by implementing the right strategies over time.
Let’s have a look at what your blog’s growth would look like.
Month 1 to 6: Lay the Foundation of Your Blog
The first six months are very crucial in establishing the foundation of your blog. You should focus on creating high-quality and value-driven content that perfectly aligns with your target audience.
Just focus on the three main things mentioned below to provide quality content.
Publish Consistent Content: Create a content calendar for your blog to publish content consistently. Plus, it will also help you plan quality content and cover a wide variety of topics.
Use Pinterest for Traffic: Amongst all social media platforms, Pinterest is one of the best platforms to drive traffic to your blog.
Start Building Your Email List: In the first six months, you should also focus on creating your email list. It will help you in email marketing in the future.
Month 6 to 12: Leveling Up Your Income Streams
After six months, blogs generally start gaining traction, and you have built a substantial audience base, driving your pageviews and email subscribers.
You may do two things as mentioned below to generate revenue.
(i) Apply for Premium Ad Networks
Once you start gaining traffic of around 25,000 to 50,000 sessions every month, you can apply for higher-paying ad networks like Mediavine or AdThrive to attain better revenue potential than Google AdSense.
If you have not achieved this much traffic for now, you should sign up for Google Adsense. Seeing your first few dollars through blogging will be an amazing experience.
(ii) Experiment with Affiliate Marketing
Affiliate Marketing is one of the major income sources for bloggers. Because, organic traffic always converts better compared to other channels like social media or referrals.
To promote affiliate products, you should create specific types of content, as mentioned below.
- Case Studies
- Affiliate marketing product reviews
- Comparison posts
- Discounts and Promo Codes
We also recommend you check affiliate programs within your niche. Otherwise, it may lead you to face challenges in the future.
After 12 Months: Limitless Possibilities
Now that you have been blogging for a while, it’s time to start building your audience and gaining consistent traffic from Google, Pinterest, and other channels while earning some money through ad network platforms and affiliate marketing; let’s focus on diversifying your income streams even more.
(i) Create Your Own Products
To go beyond just earning through ads and affiliate marketing programs, you can create your own products.
Here are several types of products that you can create.
- Merchandise
- eBooks
- Plugins Tools
- Online Course
You must create highly educational content around the products you want to sell. Focus on content related to problem-solving.
(ii) Online Coaching
This is an era of online coaching courses, where creators sell their courses to people and earn through membership or one-time fees in exchange for already created products.
(iii) Consultation
You can even offer 1:1 consultation services by positioning yourself as a leader in the industry. People will pay for your knowledge and expertise in a particular field.
Conclusion
So, that’s all about the blog. I hope you like it and this guide may help you how to start a blog in 2025 and make money through it. Do let me know in the comments what you like the most about in this blog? Subscribe to KishanSingh blog to get such more insightful content.
FAQs
Can I start a blog with no experience?
Yes! This guide is beginner-friendly and shows you how to blog without coding.
What’s the best hosting for beginners?
Hostinger and Bluehost are affordable and easy to set up with 1-click WordPress install.
How much does it cost to start a blog?
Expect to pay $40–$70/year for hosting + domain if you use deals listed here.
Is blogging still profitable in 2025?
Absolutely! Blogging + Affiliate Marketing is still a strong source of online income in Tier-1 countries.
How long before I make money blogging?
If you’re consistent, many bloggers earn their first $100 within 3–6 months.